


Halbfester Kleber. Neues Upgrade. Superstark. Schnelltrocknend. Mit Entferner-Set.


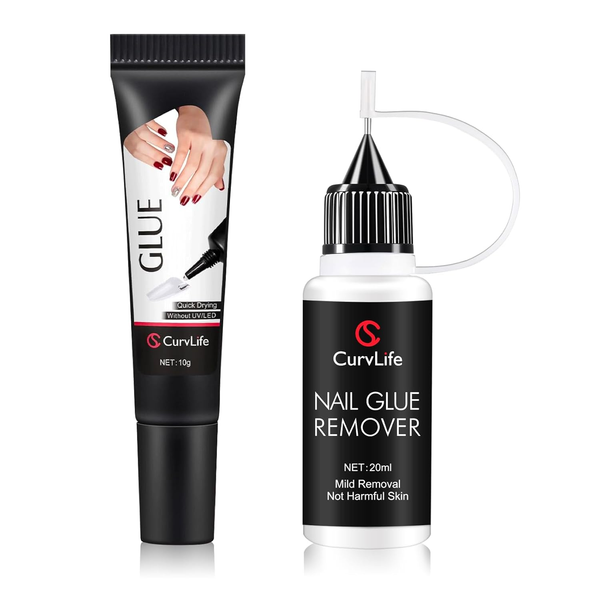
- Upgraded Kit glue and pinpoint remover) - $12.99
- Kit 1 – Nagelkleber und -entferner - $12.99
- Kit 2 - Kleber + Entferner + Drücker - $13.99
How to Apply CurvLife Press-On Nails


Need Help?
We're just an email away — contact us at service@curvlife.com if you need any help!
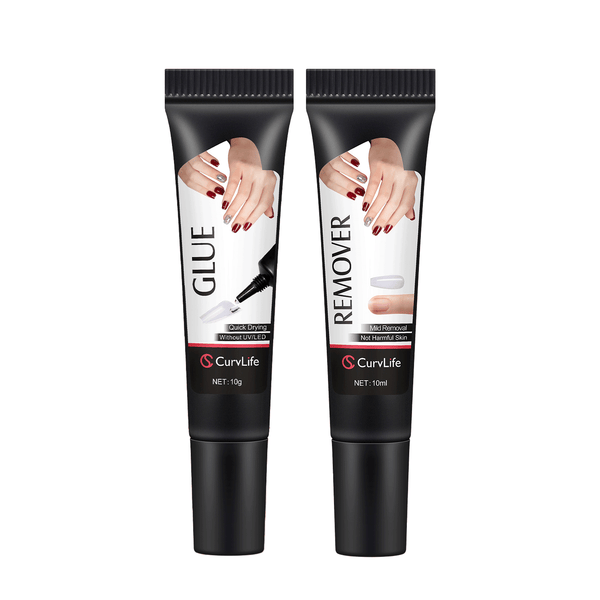
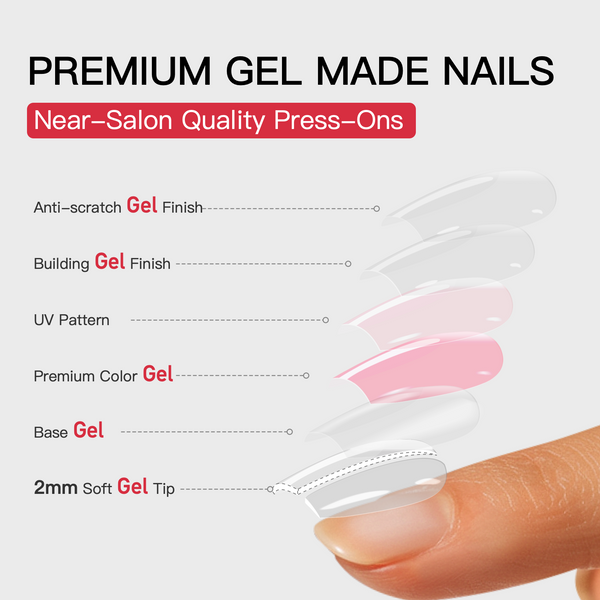
PRODUCT DETAILS
Einfach anzuwenden
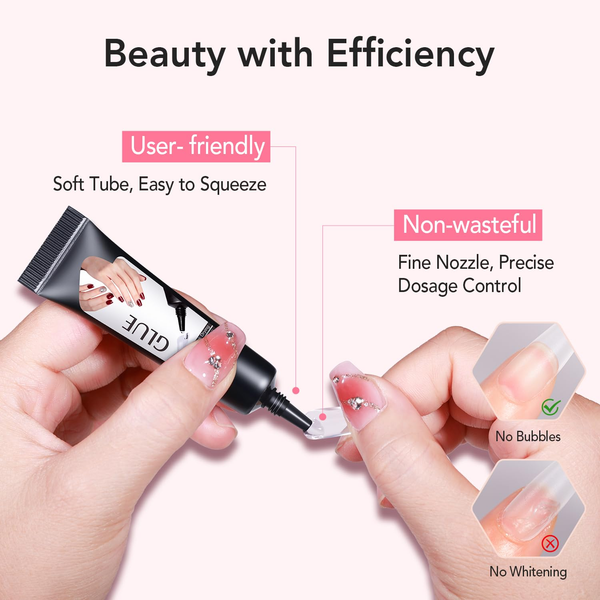
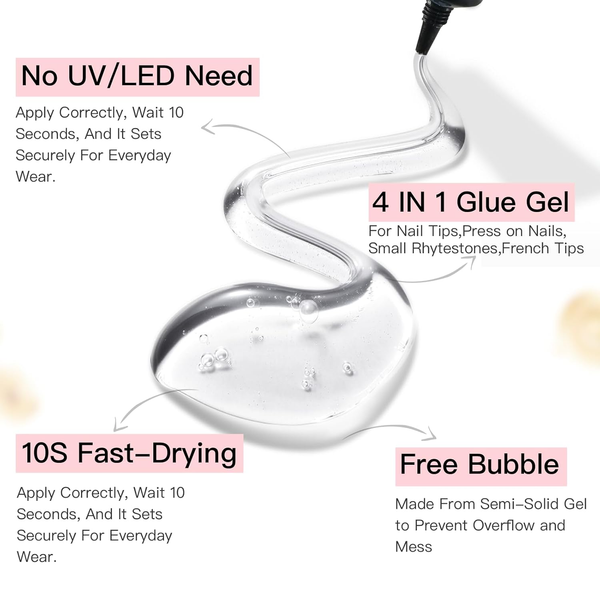
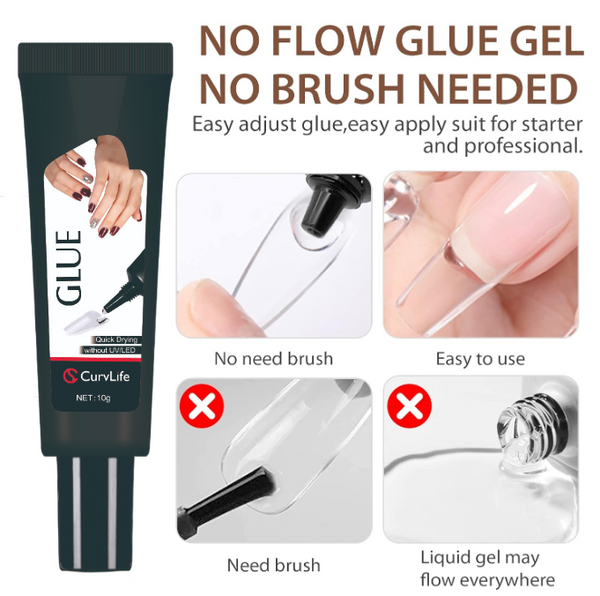
Unser Nagelkleber verfügt über eine tropf- und verstopfungssichere Gelformel und trocknet in nur 10 Sekunden, ohne dass UV-Licht erforderlich ist. Er befindet sich in einem halbfesten Zustand, ohne dass etwas aus dem Nagelbett austritt. Er lässt sich leicht auftragen.

Ultrastark
Unser Kleber sorgt für dauerhafte und einwandfreie Ergebnisse – sehr stark!

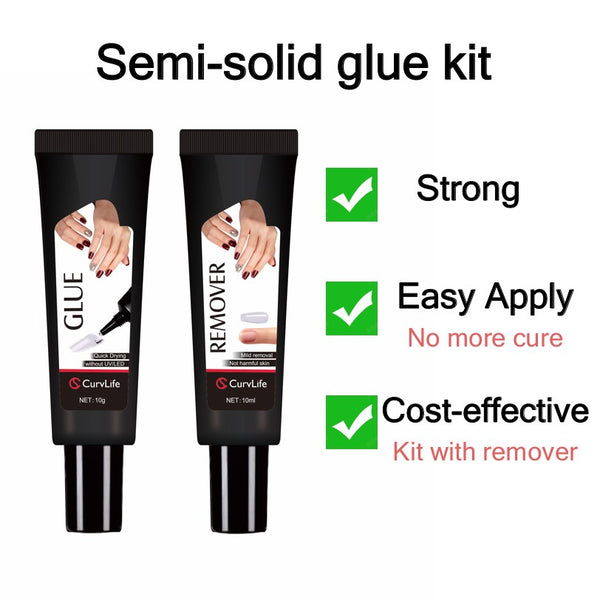
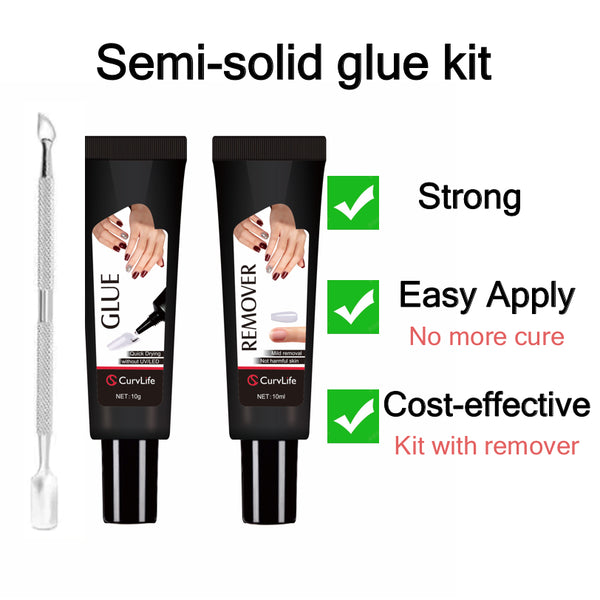
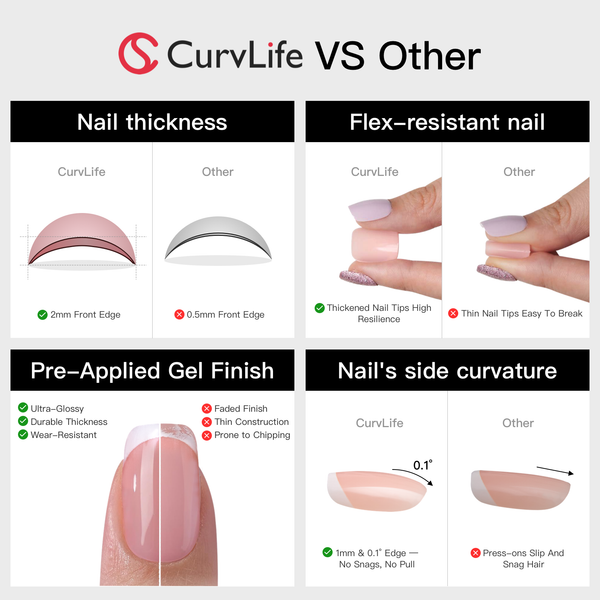
Exklusives Paketangebot : Hochwertiges Kleber- und Entferner-Set, inklusive Schleifstreifen und Applikatorstäbchen, vereinfacht Ihre Nagelpflege und senkt die Salonkosten
Sicherer und gesünder: Der Trocknungsprozess ist sehr schonend. Es fühlt sich nicht heiß an und verbrennt die Finger wie flüssiger Kleber
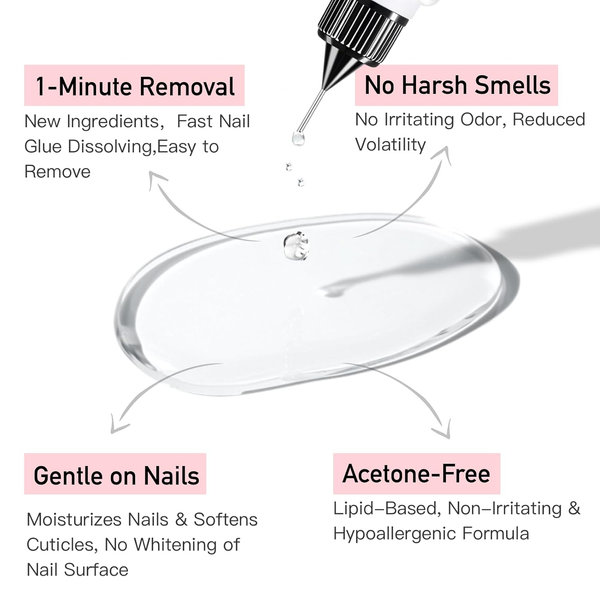
Müheloses Entfernen : Unser REMOVER nutzt ein innovatives Tropfdesign und dringt effektiv in enge Zwischenräume zwischen den Nägeln ein. In nur 2-3 Minuten können Sie das Produkt schnell und ohne mühsames Entfernen entfernen und sparen so Zeit und Geld.
Schönheit leicht gemacht: Mit unserem Kleber befestigen Sie Kunstnägel und Nailart sicher für verschiedene Aktivitäten wie Händewaschen, Yoga und Tippen. Der Entferner entfernt mühelos und schnell Rückstände und sorgt so für eine sorgenfreie Nagelpflege.

So entfernen Sie
Gute Tipps: Der Kleber ist in den ersten drei Tagen am stärksten, was das Entfernen erschwert und Ihre natürlichen Nägel beschädigen kann. Es wird empfohlen, mindestens fünf Tage zu warten, bevor Sie die Nägel entfernen. Wenn Sie die künstlichen Nägel nur 3–5 Tage tragen und wiederverwenden möchten, empfehlen wir Ihnen den Kauf unseres festen Klebers.
- 1. Tragen Sie den Entferner rund um die Nagelränder auf.
- 2. Verwenden Sie einen Nagelhautschieber oder ein Nagelstäbchen, um die Stelle vorsichtig anzuheben und eine Lücke zu schaffen.
- 3. Tragen Sie mehr Entferner auf und warten Sie 20 Sekunden.
- 4. Den gesamten künstlichen Nagel vorsichtig abhebeln.
- 5. Sollten sich Klebereste auf Ihren Naturnägeln befinden, tragen Sie den Entferner direkt auf die Nägel auf und entfernen Sie mit dem Nagelstäbchen die Kleberreste.
- 6. Reinigen Sie Ihre Nägel abschließend gründlich mit einem Alkoholtupfer.
Tragen einer Schutzausrüstung: Nach dem Entfernen ist der künstliche Nagel möglicherweise nicht mehr wiederverwendbar.
Anleitungsvideo mit weiteren Details? ?Wird geladen....)
HOW TO CHOOSE GLUE
- For one-day wear (e.g., parties or photoshoots), carehold tabs are recommended.
- For light-colored nails worn for a week with reuse in mind, solid glue is advisable.
- For long-lasting wear, semi-solid glue is the best choice.
| How to Choose Glue? |
 Shop
Shop
|
 Shop
Shop
|
 Shop
Shop
|
 Shop
Shop
|
| Glue | Semi-Solid Glue | Solid Glue | Brush-on Glue | Carehold Tabs |
| Duration | 14–20 Days | 5–7 Days | 7–10 Days | 7–14 Days |
| Need UV Cured | No | Yes | No | No |
| Air Bubbles | No | No | Yes | No |
| Dry Time | 15 sec | 30 sec | 15 sec | 10 sec |
| Nails Reusable | No | Yes | No | Yes |
| Burned Nail | No | No | Yes | No |
| Easily Leakage | No | No | Yes | No |
| Points To Note | – | Can't secure dark-colored fake nails | – | – |
| Tutorial | View | View | – | View |
TUTORIAL
How to Apply CurvLife Press-On Nails
Need Help?
We're just an email away — contact us at service@curvlife.com if you need any help!
SHIPPING
| Order Amount | Country | Shipping Fee |
|---|---|---|
| Over $49.99 | All | Free |
| Under $49.99 | Canada | $7.99 |
| Under $49.99 | Other | $6.99 |
Notes:
1) Most orders ship within 48 business hours and shipping Time is 3–7 Business Days.
2) We ship from New Jersey, USA. We will make every effort to deliver your package ASAP.
3) Should your package not arrive within 25 days after your order, please contact Customer Support at service@curvlife.com.
