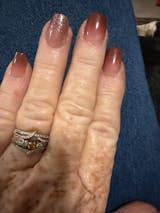
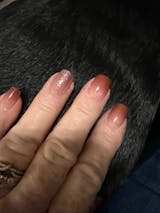
- Fester Nagelkleber Gel-30g - $9.99
Table of Contents
- 1. Nail Preparation is Essential
- 2. Choose the Right Size and Direction
- 3. Choose the Glue and Apply
- 4. Personalize Your Look (Optional)
- 5. How to Remove
- Need Help
1. Nail Preparation is Essential
Proper nail prep helps your press-on nails stay longer and look more natural.
Prep Your Cuticles
Use a cuticle pusher to gently scrape off dead skin and trim off any excess cuticle. This gives a cleaner nail bed and helps the press-on nails fit better without bumps or gaps.
Buff Your Nails
This is a must for a stronger, longer-lasting hold. Buff the surface of your natural nails, and finish by wiping your nails with an alcohol pad to remove dust and oils.
2. Choose the Right Nails Size and Direction
Find the Correct Direction
The thicker end (with the number on the back) goes at your fingertip, and the thinner end should align with your cuticle. If placing the thicker end with your cuticle, the fit will be poor and may not adhere properly.
Pick the Right Size
Our sets include 12–15 sizes to help you find the best match. If none of the included sizes fit perfectly, choose a slightly larger one and file down the edges for a custom fit.
3. Choose the Glue and Apply
Tips for Better Hold
- Apply glue to both your nail and the press-on nail, or slide the press-on slightly 2–3 times when applying to evenly spread the glue.
- Hold firmly for 20 seconds.
- Avoid contact with water for 1 hour.
Recommended Glues Based on Usage:
- -Wear for one day like parties or photoshoots, adhesive tabs are recommended.
- For light-colored nails worn for a week with reuse in mind, solid glue is advisable.
- For long-lasting wear, semi-solid glue is the best choice.
Glue |  Shop Shop |  Shop Shop |  Shop Shop |  Shop Shop |
| Name | Sem-Solid Glue | Solid Glue | Liquid Glue | Adhesive Tabs |
| Duration | 14-20 Days | 5-7 Days | 7-10 Days | 1-2 Days |
| Need UV Cured | No | Yes | No | N0 |
| Air Bubbles | No | No | Yes | Yes |
| Dry Time | 15 sec | 30 sec | 15 sec | 10 sec |
| Nails Reusable | No | Yes | No | Yes |
| Burned Nail | No | No | Yes | No |
| Easily Leakage | No | No | Yes | No |
| Points To Note | - | Can't secure dark-colored fake nails | - | - |
| Tutorial | View | View | View |
4. Personalize Your Look (Optional)
If there is any leftover glue on the edges of your nails, remove it, and then you can achieve a perfect manicure. If you have specific requirements for the shape and length, you can trim or file the nails to your desired shape and length.
5. How to Remove
Soak your nails in warm water for about 10 minutes to loosen the adhesive. Gently lift the press-on nail from the edges using a wooden stick. After removal, apply cuticle oil to nourish your nails.
For faster removal and less damage, you can use the Curvlife Remover.
 |  |
Shop |
Need Help?
We're just an email away—contact us at service@curvvlife.com if you need any help!
PRODUKTDETAILS

„Nagelkleber-Gel mit gesunden Inhaltsstoffen“ – Das Nagelkleber-Gel besteht aus gesunden Inhaltsstoffen, hat keinen unangenehmen Geruch, ist umweltfreundlich, ungiftig, unschädlich für Ihre Haut und Ihre natürlichen Nägel und bietet Ihnen ein angenehmes und glückliches Nagelerlebnis.
???Basislack auftragen und aushärten lassen??- Nach Abschluss der Nagelvorbereitung muss ein Basislack aufgetragen und ausgehärtet werden; dann das feste UV-Klebegel auftragen und mindestens 60 Sekunden unter der Nagellampe aushärten lassen. Der UV-Nagelkleber mit guter Flexibilität kann vor dem Aushärten neu positioniert werden, was sehr praktisch ist.
DIY Nail Art Gelkleber – Geeignet für professionelle Maniküristen und Nagelliebhaber. Er erfüllt die Anforderungen einer Vielzahl von Nailart-Arbeiten gleichzeitig. Genießen Sie ein Salonerlebnis mit Freunden und Familie zu Hause und kreieren Sie wunderschöne Nailart-Designs. Ein wunderbares Geschenk für Ihre Frau, Freundin, Mutter oder Schwestern und perfekt für Partys, Verabredungen und Hochzeiten. Geburtstage usw.
Produkteigenschaften:
- Keine Blasen? Kein weißliches
- Sehr stark
- Multifunktion
- Einfach anzuwenden
- Passt gut ins Nagelbett
So bewerben Sie sich:
- Wählen Sie Nägel, die zu Ihrer Nagelgröße passen.
- Tragen Sie mittelfestes Nagelkleber-Gel auf die Nagelspitzen auf
- Drücken Sie, passen Sie die Nagelposition an und fixieren Sie sie (achten Sie darauf, dass keine Luftblasen entstehen).
- Wischen Sie das verschüttete Gel ab
- Nägel unter UV-Lampe aushärten (bei hellen Nägeln 1–3 Minuten aushärten; für? Bei neutralen Farben wird eine Aushärtungszeit von 3–5 Minuten empfohlen. Die Anwendung auf vollständig deckenden Farbnägeln wird nicht empfohlen .)
 ?
?  ?
? 
So entfernen Sie:
Warme Tipps:
- Dunkle Farben wie Schwarz oder Dunkelgrün lassen das Licht möglicherweise nicht optimal durch, was zu einer schlechten Haftung führt. Für eine bessere Fixierung empfehlen wir unseren halbfesten Kleber.
- Bei kaltem Wetter kann der Kleber aushärten, da das Gel temperaturempfindlich ist. Wenn Sie ein erstarrtes Kolloid erhalten, können Sie den Behälter vor Gebrauch 30 Minuten in heißem Wasser einweichen, um die Klebrigkeit wiederherzustellen.
- Bitte verschließen Sie den Verschluss rechtzeitig nach Gebrauch und schützen Sie das Produkt vor direkter Sonneneinstrahlung.
WIE MAN DEN KLEBER AUSWÄHLT
- Wear for one day like parties or photoshoots, adhesive tabs are recommended.
- For light-colored nails worn for a week with reuse in mind, solid glue is advisable.
- For long-lasting wear, semi-solid glue is the best choice.
|
How to Choose Glue ?
|
 Shop Shop |
 Shop Shop |
 Shop Shop |
 Shop Shop |
| Glue | Sem-Solid Glue | Solid Glue | Liquid Glue | Adhesive Tabs |
| Duration | 14-20 Days | 5-7 Days | 7-10 Days | 1-2 Days |
| Need UV Cured | No | Yes | No | N0 |
| Air Bubbles | No | No | Yes | Yes |
| Dry Time | 15 sec | 30 sec | 15 sec | 10 sec |
| Nails Reusable | No | Yes | No | Yes |
| Burned Nail | No | No | Yes | No |
| Easily Leakage | No | No | Yes | No |
| Points To Note | - | Can't secure dark-colored fake nails | - | - |
| Tutorial | View | View | View |
LERNLEITUNG
Table of Contents
- 1. Nail Preparation is Essential
- 2. Choose the Right Size and Direction
- 3. Choose the Glue and Apply
- 4. Personalize Your Look (Optional)
- 5. How to Remove
- Need Help
1. Nail Preparation is Essential
Proper nail prep helps your press-on nails stay longer and look more natural.
Prep Your Cuticles
Use a cuticle pusher to gently scrape off dead skin and trim off any excess cuticle. This gives a cleaner nail bed and helps the press-on nails fit better without bumps or gaps.
Buff Your Nails
This is a must for a stronger, longer-lasting hold. Buff the surface of your natural nails, and finish by wiping your nails with an alcohol pad to remove dust and oils.
2. Choose the Right Nails Size and Direction
Find the Correct Direction
The thicker end (with the number on the back) goes at your fingertip, and the thinner end should align with your cuticle. If placing the thicker end with your cuticle, the fit will be poor and may not adhere properly.
Pick the Right Size
Our sets include 12–15 sizes to help you find the best match. If none of the included sizes fit perfectly, choose a slightly larger one and file down the edges for a custom fit.
3. Choose the Glue and Apply
Tips for Better Hold
- Apply glue to both your nail and the press-on nail, or slide the press-on slightly 2–3 times when applying to evenly spread the glue.
- Hold firmly for 20 seconds.
- Avoid contact with water for 1 hour.
Recommended Glues Based on Usage:
- -Wear for one day like parties or photoshoots, adhesive tabs are recommended.
- For light-colored nails worn for a week with reuse in mind, solid glue is advisable.
- For long-lasting wear, semi-solid glue is the best choice.
|
Glue
|
 Shop Shop
|
 Shop Shop
|
 Shop Shop
|
 Shop Shop
|
| Name | Sem-Solid Glue | Solid Glue | Liquid Glue | Adhesive Tabs |
| Duration | 14-20 Days | 5-7 Days | 7-10 Days | 1-2 Days |
| Need UV Cured | No | Yes | No | N0 |
| Air Bubbles | No | No | Yes | Yes |
| Dry Time | 15 sec | 30 sec | 15 sec | 10 sec |
| Nails Reusable | No | Yes | No | Yes |
| Burned Nail | No | No | Yes | No |
| Easily Leakage | No | No | Yes | No |
| Points To Note | - | Can't secure dark-colored fake nails | - | - |
| Tutorial | View | View | View |
4. Personalize Your Look (Optional)
If there is any leftover glue on the edges of your nails, remove it, and then you can achieve a perfect manicure. If you have specific requirements for the shape and length, you can trim or file the nails to your desired shape and length.
5. How to Remove
Soak your nails in warm water for about 10 minutes to loosen the adhesive. Gently lift the press-on nail from the edges using a wooden stick. After removal, apply cuticle oil to nourish your nails.
For faster removal and less damage, you can use the Curvlife Remover.

|
 |
Shop |
Need Help?
We're just an email away—contact us at service@curvvlife.com if you need any help!
VERSAND UND RÜCKGABE
| Country | Order Amount | Shipping Fee | Shipping time |
| United States | Over $39.99 | Free | 7 - 20 Business Days |
| Under $39.99 | $6.99 | 7 - 20 Business Days | |
| Canada | Over $39.99 | Free | 10 - 25 Business Days |
| Under $39.99 | $7.99 | 10 - 25 Business Days | |
| other | Over $39.99 | Free | 7 - 20 Business Days |
| Under $39.99 | $6.99 | 7 - 20 Business Days |
Return & Refund Policy
We hope you love what you've ordered! But just in case you're not 100% satisfied, we've made the return process super easy.


