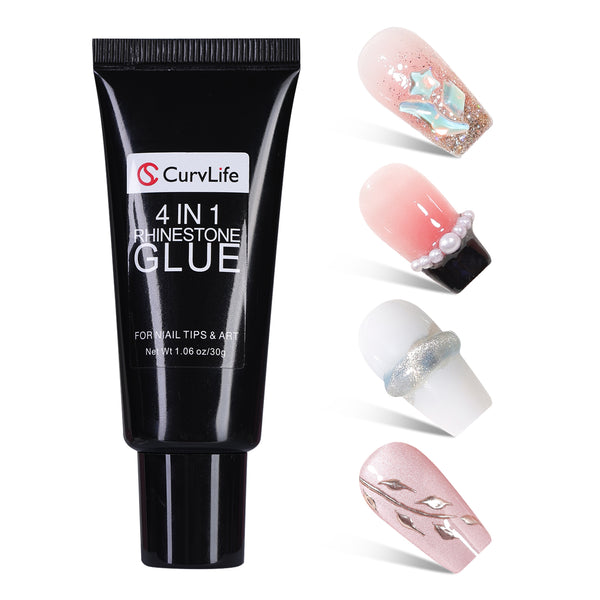
- 30G - $9.99
- 15G - $7.99
Table of Contents
- 1. Nail Preparation is Essential
- 2. Choose the Right Size and Direction
- 3. Choose the Glue and Apply
- 4. Personalize Your Look (Optional)
- 5. How to Remove
- Need Help
1. Nail Preparation is Essential
Proper nail prep helps your press-on nails stay longer and look more natural.
Prep Your Cuticles
Use a cuticle pusher to gently scrape off dead skin and trim off any excess cuticle. This gives a cleaner nail bed and helps the press-on nails fit better without bumps or gaps.
Buff Your Nails
This is a must for a stronger, longer-lasting hold. Buff the surface of your natural nails, and finish by wiping your nails with an alcohol pad to remove dust and oils.
2. Choose the Right Nails Size and Direction
Find the Correct Direction
The thicker end (with the number on the back) goes at your fingertip, and the thinner end should align with your cuticle. If placing the thicker end with your cuticle, the fit will be poor and may not adhere properly.
Pick the Right Size
Our sets include 12–15 sizes to help you find the best match. If none of the included sizes fit perfectly, choose a slightly larger one and file down the edges for a custom fit.
3. Choose the Glue and Apply
Tips for Better Hold
- Apply glue to both your nail and the press-on nail, or slide the press-on slightly 2–3 times when applying to evenly spread the glue.
- Hold firmly for 20 seconds.
- Avoid contact with water for 1 hour.
Recommended Glues Based on Usage:
- -Wear for one day like parties or photoshoots, adhesive tabs are recommended.
- For light-colored nails worn for a week with reuse in mind, solid glue is advisable.
- For long-lasting wear, semi-solid glue is the best choice.
Glue | ![]() | ![]() | ![]() | ![]() |
Name | Sem-Solid Glue | Solid Glue | Liquid Glue | Adhesive Tabs |
Duration | 14-20 Days | 5-7 Days | 7-10 Days | 1-2 Days |
Need UV Cured | No | Yes | No | N0 |
Air Bubbles | No | No | Yes | Yes |
Dry Time | 15 sec | 30 sec | 15 sec | 10 sec |
Nails Reusable | No | Yes | No | Yes |
Burned Nail | No | No | Yes | No |
Easily Leakage | No | No | Yes | No |
Points To Note | - | Can't secure dark-colored fake nails | - | - |
Tutorial | View | View | View |
4. Personalize Your Look (Optional)
If there is any leftover glue on the edges of your nails, remove it, and then you can achieve a perfect manicure. If you have specific requirements for the shape and length, you can trim or file the nails to your desired shape and length.
5. How to Remove
Soak your nails in warm water for about 10 minutes to loosen the adhesive. Gently lift the press-on nail from the edges using a wooden stick. After removal, apply cuticle oil to nourish your nails.
For faster removal and less damage, you can use the Curvlife Remover.
![]() | ![]() |
Shop |
Need Help?
We're just an email away—contact us at service@curvvlife.com if you need any help!
PRODUKTDETAILS
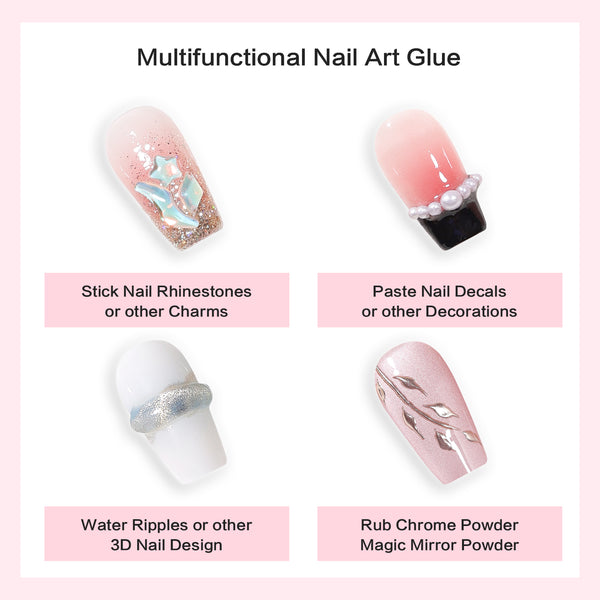
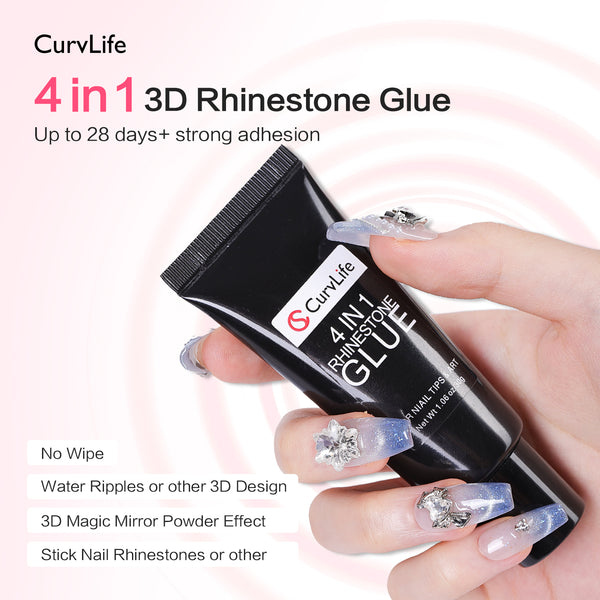
- 4-in-1-Design: Curvlife 4-in-1-Nagelkunstkleber eignet sich für Naturnägel, Kunstnägel, Press-on-Nägel, Gel-Nagellack, Poly-Nagelgel, Acrylpulver oder Nagelspitzen. Der Nagelkunstkleber ist konzipiert für: 1. Das Anbringen von Edelsteinen mit starker Klebrigkeit, um ein leichtes Abfallen der Strasssteine zu verhindern, obwohl er nur für kleine Strasssteine geeignet ist; 2. Die Kombination mit Spiegelpulver ermöglicht verschiedene Farbkombinationen; 3. Das Erstellen interessanter 3D-Nagelformen zum Modellieren ohne Nagelbürste; 4. Eine No-Wipe-Formel, sodass Sie sich keine Sorgen über Ablösen machen müssen.
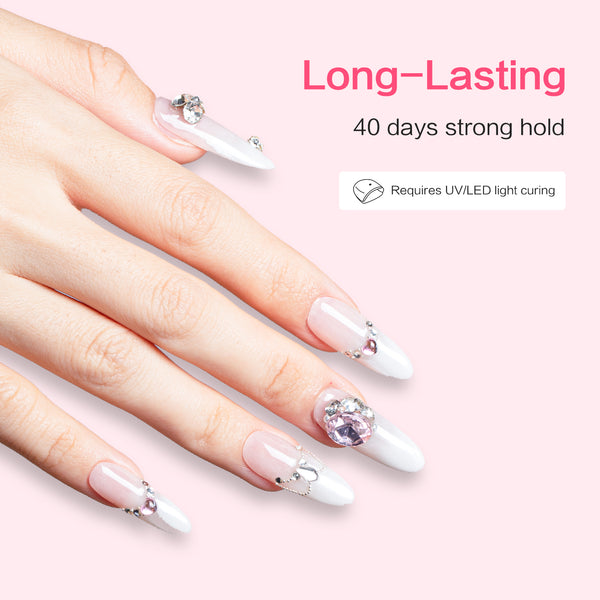
- Starker Halt: Dieser Nagelkunstkleber ist stark haftend und hält Edelsteine, Perlen und Strasssteine sicher fest. Damit eignet er sich perfekt für schillernde Nageldesigns. Bei richtiger Anwendung und 30 Sekunden Aushärtung unter einer UV-Lampe hält er mindestens 5 Wochen.
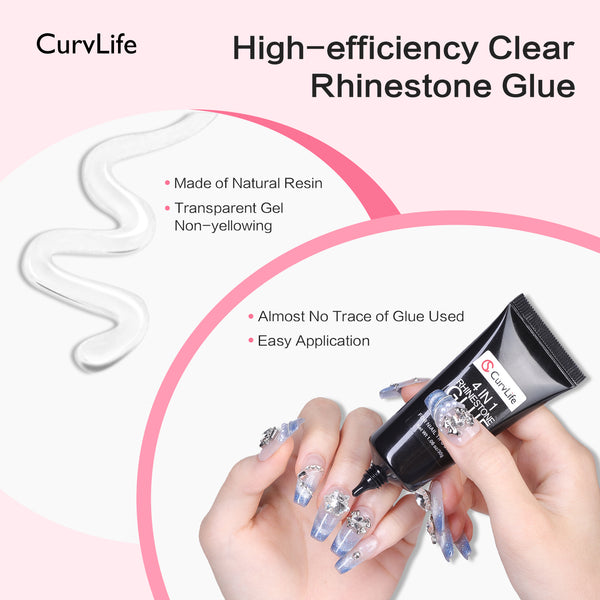
- Praktisch in der Anwendung: Der Curvlife 4-in-1-Nagelkunstkleber hat ein Tubendesign, mit dem Sie ganz einfach die richtige Menge herausdrücken können, ohne dass es zu Kleckern kommt! Er ist klebefest und haftet stark. Die 15-g-Flasche Kristallkleber ist ein unverzichtbares Werkzeug für Nageldesigner und hilft Anfängern, schnell zu Experten zu werden.
- Gesunde Inhaltsstoffe: Curvlife Nail Diamond Glue besteht aus Naturharz, ist MSDS-zertifiziert und erfüllt die Standards für Veganismus und Tierversuche. Es ist geruchsneutral und sanft zu Haut und Nägeln. Der Strasskleber trocknet schnell unter UV-Licht. Zum Entfernen verwenden Sie einen Nagelfräser. Es ist ein hervorragendes Beauty-Geschenk für Nailart-Fans.
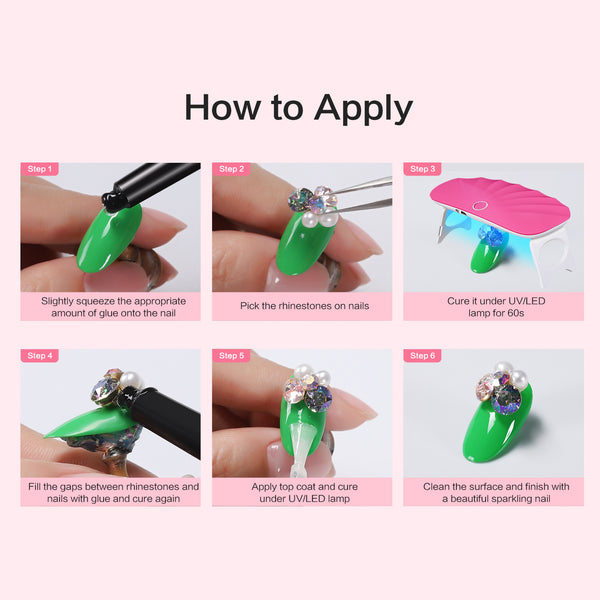
Anwendung:
- 1. Tragen Sie das Nagelkristall-Klebeharz auf den Nagel auf.
- 2. Platzieren Sie die Strasssteine und lassen Sie sie etwa 1–2 Minuten lang unter UV-Licht aushärten. Die Aushärtezeiten können je nach Lampe variieren. Stellen Sie daher sicher, dass die Steine vollständig trocken sind.
- 3. Dieses Produkt ist nicht für große Strasssteine geeignet, da diese sich leicht lösen können. Für eine bessere Haftung tragen Sie zusätzlichen Kleber in die Zwischenräume und die Basis auf und härten Sie ihn erneut mit der Nagellampe aus, bis er vollständig getrocknet ist, um sicherzustellen, dass Ihre Nageldekorationen sicher an ihrem Platz sitzen.
WIE MAN DEN KLEBER AUSWÄHLT
- Wear for one day like parties or photoshoots, adhesive tabs are recommended.
- For light-colored nails worn for a week with reuse in mind, solid glue is advisable.
- For long-lasting wear, semi-solid glue is the best choice.
How to Choose Glue ?
|
![]() |
![]() |
![]() |
![]() |
Glue | Sem-Solid Glue | Solid Glue | Liquid Glue | Adhesive Tabs |
Duration | 14-20 Days | 5-7 Days | 7-10 Days | 1-2 Days |
Need UV Cured | No | Yes | No | N0 |
Air Bubbles | No | No | Yes | Yes |
Dry Time | 15 sec | 30 sec | 15 sec | 10 sec |
Nails Reusable | No | Yes | No | Yes |
Burned Nail | No | No | Yes | No |
Easily Leakage | No | No | Yes | No |
Points To Note | - | Can't secure dark-colored fake nails | - | - |
Tutorial | View | View | View |
LERNLEITUNG
Table of Contents
- 1. Nail Preparation is Essential
- 2. Choose the Right Size and Direction
- 3. Choose the Glue and Apply
- 4. Personalize Your Look (Optional)
- 5. How to Remove
- Need Help
1. Nail Preparation is Essential
Proper nail prep helps your press-on nails stay longer and look more natural.
Prep Your Cuticles
Use a cuticle pusher to gently scrape off dead skin and trim off any excess cuticle. This gives a cleaner nail bed and helps the press-on nails fit better without bumps or gaps.
Buff Your Nails
This is a must for a stronger, longer-lasting hold. Buff the surface of your natural nails, and finish by wiping your nails with an alcohol pad to remove dust and oils.
2. Choose the Right Nails Size and Direction
Find the Correct Direction
The thicker end (with the number on the back) goes at your fingertip, and the thinner end should align with your cuticle. If placing the thicker end with your cuticle, the fit will be poor and may not adhere properly.
Pick the Right Size
Our sets include 12–15 sizes to help you find the best match. If none of the included sizes fit perfectly, choose a slightly larger one and file down the edges for a custom fit.
3. Choose the Glue and Apply
Tips for Better Hold
- Apply glue to both your nail and the press-on nail, or slide the press-on slightly 2–3 times when applying to evenly spread the glue.
- Hold firmly for 20 seconds.
- Avoid contact with water for 1 hour.
Recommended Glues Based on Usage:
- -Wear for one day like parties or photoshoots, adhesive tabs are recommended.
- For light-colored nails worn for a week with reuse in mind, solid glue is advisable.
- For long-lasting wear, semi-solid glue is the best choice.
Glue
|
![]() |
![]() |
![]() |
![]() |
Name | Sem-Solid Glue | Solid Glue | Liquid Glue | Adhesive Tabs |
Duration | 14-20 Days | 5-7 Days | 7-10 Days | 1-2 Days |
Need UV Cured | No | Yes | No | N0 |
Air Bubbles | No | No | Yes | Yes |
Dry Time | 15 sec | 30 sec | 15 sec | 10 sec |
Nails Reusable | No | Yes | No | Yes |
Burned Nail | No | No | Yes | No |
Easily Leakage | No | No | Yes | No |
Points To Note | - | Can't secure dark-colored fake nails | - | - |
Tutorial | View | View | View |
4. Personalize Your Look (Optional)
If there is any leftover glue on the edges of your nails, remove it, and then you can achieve a perfect manicure. If you have specific requirements for the shape and length, you can trim or file the nails to your desired shape and length.
5. How to Remove
Soak your nails in warm water for about 10 minutes to loosen the adhesive. Gently lift the press-on nail from the edges using a wooden stick. After removal, apply cuticle oil to nourish your nails.
For faster removal and less damage, you can use the Curvlife Remover.
![]() |
![]() |
Shop |
Need Help?
We're just an email away—contact us at service@curvvlife.com if you need any help!
VERSAND UND RÜCKGABE
Country | Order Amount | Shipping Fee | Shipping time |
United States | Over $39.99 | Free | 7 - 20 Business Days |
Under $39.99 | $6.99 | 7 - 20 Business Days | |
Canada | Over $39.99 | Free | 10 - 25 Business Days |
Under $39.99 | $7.99 | 10 - 25 Business Days | |
other | Over $39.99 | Free | 7 - 20 Business Days |
Under $39.99 | $6.99 | 7 - 20 Business Days |
Return & Refund Policy
We hope you love what you've ordered! But just in case you're not 100% satisfied, we've made the return process super easy.